_7i7o, piablo @ Developer_DAO
August 15, 2022
Twitter @7i7o.eth, @Skruffster
Created by:
Avatar_7i7o, piablo @ Developer_DAO
August 15, 2022
Twitter @7i7o.eth, @Skruffster
Welcome to our introductory lesson on smart contract development, blockchain fundamentals and your first taste of coding with the Solidity language. For this lesson, you don’t really need to have development experience, although we expect you to have a ‘technical mindset’ to be able to proceed. We would recommend Build a basic NFT as a subsequent lesson for getting familiar with more advanced concepts and developer tooling. But first things first.
We have some questions for you throughout the lesson for testing your previous knowledge, predicting next steps in the lesson, and letting you see for yourself how well you're absorbing the new content. There's also a quiz at the end, of course, so make sure you're checking out all the side-drawers for a deeper dive of any new concepts. To complete the lesson, expect somewhere between one and four hours depending on your previous experience and the need to learn new ideas. Remember your well-being and set the pomodoro timer in the menu header to ensure you’re taking regular breaks, and please do go outside and 'touch some grass’.
We’re going to build a smart contract, but what on Jupiter is a smart contract? And what on Earth would we use one for? Well, you wouldn’t find a smart contract on either Jupiter, or Earth, and although you may be grounded to the latter, you are going to deploy yours on a blockchain. Not a real blockchain, well not at first. Hang on!
Let's pause here for a couple questions to give you a taste of what's to come and give yourself a chance to test what you already know.
How was that? No stress if the answers didn't come naturally. We're here to fill in the gaps! If you're interested in more context before moving along to the lesson, check out the explainers below.
Did you set the pomodoro? ⌛😊
By the end of this lesson we’ll have learned a lot. A simple breakdown of the steps to get there is:
At the end of the project, we’re really going to test your knowledge with a quiz, so take in whatever you can. We might even have some questions along the way for fun to expand your already amazing mind!
We’re going to write a smart contract, which is going to be a “Web3 fortune-teller". The idea is that you will input a message into the contract, the contract will decode the message, and like a fortune-teller would do, predict your future… in Web3.
Before we start, we need a place to write our Solidity language smart contract, and some tools to run it. For that we use the Remix IDE, short for...
To get started we will use the Remix IDE to write, compile, test and debug code quickly and easily. Head over to https://remix.ethereum.org/ to see what it’s all about and get started.
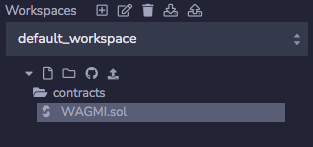
On the left hand side, in the File Explorer tab, delete all the files and folders in our workspace. We want to start fresh. Create a new folder named
The extension
Well done! Now, go touch some grass! ⌛😊
The first line of a Solidity file is for the license, the second line lets the IDE’s compiler know which Solidity version we are working with.
// SPDX-License-Identifier: MIT
pragma solidity ^0.8.4;
The MIT license is an open source license. We at Developer DAO love open source, and we love building public goods that others are free to build on… for free! The version of Solidity we’re working with is
Virtually all smart contracts contain variables, data containers that can be modified, and functions, which are like “recipes” with instructions for those variables. When a user wants to make a transaction, the function is called, i.e. executed or initiated.
Let’s create our first smart contract.
It is good practice to give the same name to the contract (uppercase first letter) and the contract’s solidity file. Let’s create a contract named
The syntax for creating a basic smart contract is as follows:
// SPDX-License-Identifier: MIT
pragma solidity ^0.8.4;

contract WAGMI {

    // ====== This is where we will write our code ======

}
We can use
How can we tell the world about our future in web3? We want our contract to be able to store the message from each new user, and also record the count of messages from all future users. We might want to check on their fortunes too! So we store the message and the count in variables. Do you remember the variable = container analogy? Different types of variable can store different types of information, e.g. numbers, ‘strings’ of text, addresses, etc. In this case we need state variables. While other variables might only be used temporarily in memory, state variables live permanently in the contract which helps to make blockchain transactions transparent. For the moment, we’ll just create them as placeholders with no value, but when we interact with our smart contract later, they will be set with actual values.
We chose
Let’s add our two state variable definitions inside our contract:
// ...
contract WAGMI {

    string message;

    uint256 messageCount;

}
Our contract needs a way to store new information on the blockchain! But both our variables are empty and have no way of storing any info... yet.
That’s why we now need some functions to store and retrieve information to and from our contract on the blockchain. The basic syntax for a public function in Solidity would look like this:
function functionName(uint256 value) public returns(bool) {

    // ====== Function logic here ======

}
We want to be able to read both the message and the count, so we are going to create a function to get the value for each variable. Later on we can set (store) the values, but first let’s retrieve them. We have to add two new functions below our state variable definitions. Do not delete our message and messageCount variables and please pay attention to all the ; and ( ) symbols:
// ...
contract WAGMI {

    // Don't delete our state variables here!

    function getMessage() public view returns(string memory) {
        return message;
    }

    function getMessageCount() public view returns(uint256) {
        return messageCount;
    }

}
Yes, there are some new keywords up there e.g. return, returns, view, etc, but don’t panic:
Ok, now we have to figure out a way to store some info on our contract!
We want to set a new message in our contract, so now we define a new function below the ones we recently created. The function should receive a new message as a parameter, store it in our state variable and also update the message count:
function setMessage(string calldata newMessage) public {

    // We add 1 to the messageCount state variable
    messageCount++;

    // We update the message state variable
    message = newMessage;
}
If you noticed, this function, unlike the previous ones, does not have the view visibility keyword and it does indeed modify the state of our contract and the blockchain. Therefore, whenever someone calls this function in the future, their wallet is going to ask them to confirm a transaction on the blockchain. That means it will use some gas, which is a transaction fee of a small amount of eth, since we are using the Ethereum blockchain. As we progress on our learning journey we will hear a lot more about gas and fees, but that’s also for future lessons.
Go touch some grass and set the pomodoro when you return ⌛😊
So far, we’ve learned to how make our contract store a message on the blockchain, and how we can use a function to retrieve it. But every time we store a new message, we overwrite the old one.
We would love to have a history of the messages, but storing everything on-chain is expensive and uses that precious space we mentioned before. When we do a deep dive into the fundamentals of nodes and storage, you’ll understand why it’s precious. Fortunately we have some mechanisms to overcome some of these storage issues and access information we might need.
Every transaction has a transaction log where we can store a limited amount of information more cheaply than we could on the actual blockchain. Transaction logs are not accessible from our smart contract, but after we’ve developed our user facing front-end app, we will be able to read them from any Ethereum node. And because Remix emulates a node, the logs are provided for us.
To create a transaction log, we need to define an
We usually define our events near the top of the contract, under the state variables. The basic syntax for defining an event with 3 parameters would be:
event EventName(uint256 indexed param1, bool param2, string param3);
In Solidity, there are two types of event parameter. The first type we define with our indexed keyword. By using a search filter on an indexed parameter we can find a past event on the blockchain. The other type is simply not indexed and therefore not searchable. Each event can have multiple parameters, but only three can be indexed. When you see the transaction logs in Remix, it should help it make more sense.
Each time that ‘something happens’ e.g. someone calls setMessage, our function will emit the event and create a log. Thus, to emit one using the example event above we can write:
emit EventName(2, false, 'Hello World!');
There’s a lot to unpack, so we’ll leave it there for now!
Let’s create an event to log all the future messages sent to our smart contract and check the fortunes to see if the sent messages are worthy of “making it” in the web3 world. 😉 After our state variables, we can define our new event as:
// We add this line after our 'message' and 'messageCount' definitions
event web3Future(uint256 indexed messageIndex, address indexed author, string message, string future);
Notice that our second parameter is defined with a new type:
Inside our
function setMessage(string calldata newMessage) public {

    // We leave our previous code
    messageCount++;

    message = newMessage;

    // ====== Here begins our new code ======

    // We create a local variable in memory to decide if GMI or NGMI
    string memory future = 'NGMI';

    // Only if the new message is 'gm', we change it to a fun response ;o)
    if (keccak256(abi.encodePacked(newMessage)) == keccak256(abi.encodePacked('gm'))) {
        future = 'WAGMI';
    }

    // We emit the event notifying the change of our state variable
    emit web3Future(messageCount, msg.sender, newMessage, future);

    // ====== End of new code ======
}
If you were wondering what msg.sender is, we can simplify it as the Ethereum address that called the function. You also probably noticed how we compare newMessage with ‘gm’. That’s because Solidity doesn’t have a way to easily compare two strings of text. But with a little bit of encoding and decoding, we can use abi.encodePacked() to convert the string into bytes and then use the hashing function keccak256() to compare the two hashes. And if they are equal, the strings are equal too 🙌. You can be sure that we’ll be deep diving on these in future lessons, so no worries!
Go touch some grass ⌛😊
Now that we have written our smart contract in full, we can compile it and deploy it to a blockchain. Since we are using the Remix IDE, we can use its tools in the sidebar for this. Here’s a brief description of the tools icons:

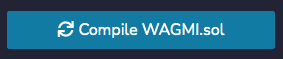
To compile our smart contract we should click on the Solidity Compiler icon in the sidebar.
Leave all the settings in their default, manually select our contract in the drop down menu and click on the Compile WAGMI.sol button.

After compiling, we should see a green check mark on top of the Solidity Compiler sidebar icon.
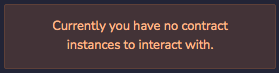
Now we are ready to deploy our contract. We can now head to the Deploy & Run transactions icon in the sidebar. Below we can see a message that says ‘Currently you have no contract instances to interact with’, so we haven’t deployed anything yet.
Again, we are leaving all options to default for now. We’ll be learning how to deploy to a testnet later on. Click on the Deploy button!
Once deployment finishes, we are going to see our shiny new deployed contract instance below.
Open the dropdown under Deployed Contracts, to see our function tabs:

From here on, we can interact with our contract. Feel free to test the functions. Click on the getMessage and messageCount tabs before and after setting a new message.
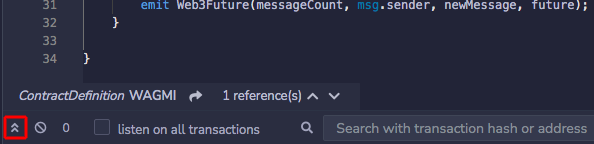
On the right hand side, below our contract code, there’s a bar on the bottom. If it hasn’t opened automatically, we can open the console from here to see any transactions with the green check mark. The first transaction is the deployment of our contract. Click it to open it.
Once you set a new message, you’ll see again, that the transaction has a green check mark, open it and look for the logs. Here’s my info after setting the message to “My first smart contract”:
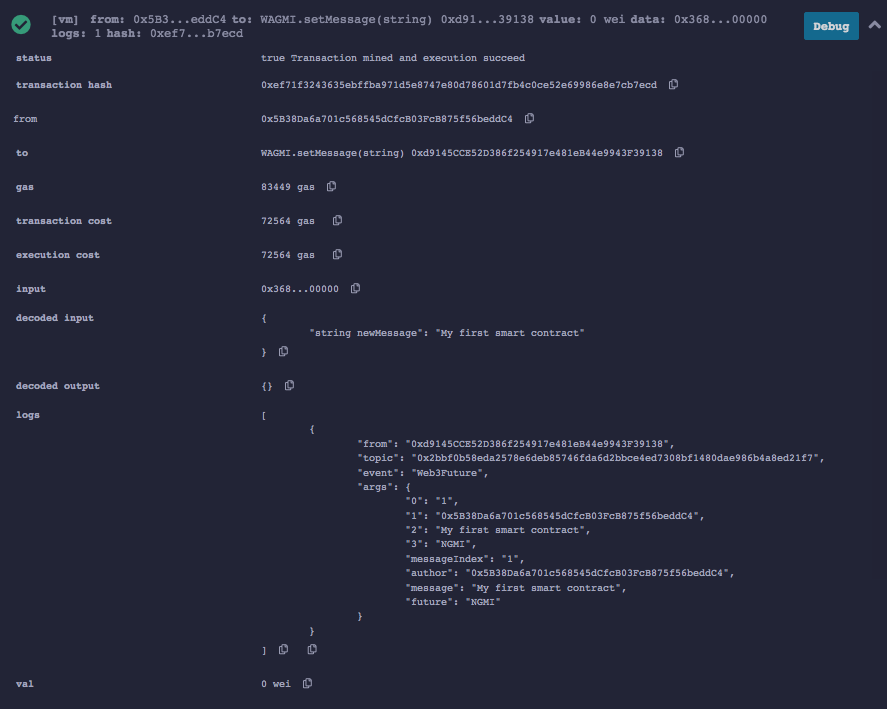
If you look closely, inside the logs part, our smart contract predicted a 'future' for us.
What if you try out setting the message to

Before you go ahead and tell us what your future in web3 is, have a check on what you didn’t know a little while ago, and what you know now!
Now, go to the community in developerdao.peeranha.io to share your new Open Sourcerer powers! And afterwards get started on our Build a basic NFT lesson. See you soon!